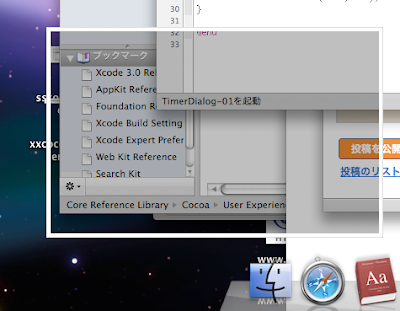
SimpleCap ではタイマーが重要な役割を果たす。範囲選択やスクリーン全体、メニューキャプチャ、そして今後予定しているアプリケーションキャプチャなど様々な場面でタイマーを利用する。今まではカウントダウンなどの視覚効果をきちんと実装してこなかった。各機能の実装が進んできたのでここらで共通に使えるタイマーのユーザインターフェイスを用意する事にする。これを「タイマーダイアログ」と呼ぶことにする。イメージとしてはダイアログの形態を取り、カウントダウン表示のほか、一時停止や秒数調整など簡単な操作が行えるようなものを考えている。表示は HUDのような半透明を考えている。ただしこれまで SimpleCapは白を基調としてきたのでこれを踏襲する。
今回はまず手始めにカスタムウィンドウ(ダイアログ)を作る。
カスタムの NSWindow と NSView を用意する。
TimerWindow.m
- (id)init
{
 NSRect rect = NSMakeRect(100, 100, 400, 250);

 self = [super initWithContentRect:rect
       styleMask:NSTexturedBackgroundWindowMask
         backing:NSBackingStoreBuffered
        defer:NO];
 if (self) {
  [self setReleasedWhenClosed:YES];
  [self setDisplaysWhenScreenProfileChanges:YES];
  [self setBackgroundColor:[NSColor clearColor]];
  [self setOpaque:NO];
  [self setHasShadow:NO];
  [self setIgnoresMouseEvents:NO];
 }

 return self;
}
NSTexturedBackgroundWindowMask を使うとウィンドウのどの部分でもドラッグして移動できるようになる。
まずは黒地と白枠を描く。
TimerWindowView.m
- (void)drawRect:(NSRect)rect {
    // Drawing code here.
 [[NSColor colorWithDeviceRed:0.0 green:0.0 blue:0.0 alpha:0.3] set];
 NSRectFill(rect);
 [[NSColor whiteColor] set];
 NSFrameRectWithWidth(rect, 5);
 [[NSColor lightGrayColor] set];
 NSFrameRectWithWidth(rect, 0.5);
}
これらを AppController で生成し紐づける。
AppController.m
- (void)awakeFromNib
{
 _window = [[TimerWindow alloc] init];
 _view = [[TimerWindowView alloc] initWithFrame:[_window frame]];
 [_window setContentView:_view];
 [_window setCollectionBehavior:NSWindowCollectionBehaviorCanJoinAllSpaces];
 [_window makeKeyAndOrderFront:self];
}
さて実行してみる。ドラッグして移動もできる。いい感じだ。

ソース:TimerDialog-01.zip
- - - -
次回は枠を丸く(RoundRect)にしてみる。
