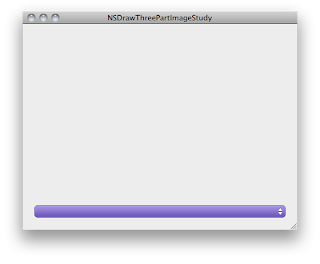
Mac OS X V10.5 から Application Kit Functions に NSDrawThreePartImage と NSDrawNinePartImage という関数が用意された。今回はこれを試してみた。
NSDrawThreePartImage
関数のシグネチャは次の通り。
void NSDrawThreePartImage(NSRect frame,
   NSImage *startCap,
   NSImage *centerFill,
   NSImage *endCap,
   BOOL vertical,
   NSCompositingOperation op,
   CGFloat alphaFraction,
   BOOL flipped
);
(参照)Mac Dev Center: Application Kit Functions Reference
この関数は単一方向に伸縮するような絵を描くのに使うようだ。左端、右端、そしてその間の画像を用意すると任意の幅の絵を描く。伸縮するボタンやスライダ、スクロールバーなどに使えそうだ。
(イメージ)
+--------+--------------------+-------+
|startCAp|    centerFill      |endCap |
|        |    ← 伸縮 →      |       |
+--------+--------------------+-------+
vertical フラグが YES の場合は垂直方向、NO の場合は水平方向で描画される。
サンプルを作ってみた。
画像は Safari4 の Resources に入っているものを参照した(※サンプルソースコードには付属していない)。
コードは、カスタムビューに描画コードを載せて、デフォルトのウィンドウのContentViewへ貼り付けた。
CustomView.m
- (void)drawRect:(NSRect)dirtyRect {
// Drawing code here.
if (!startCap) {
NSString* safariPath = @"/Applications/Safari.app/Contents/Resources";
startCap = [[NSImage alloc] initWithContentsOfFile:[safariPath stringByAppendingPathComponent:@"PurplePopUpLeft.png"]];
centerFill = [[NSImage alloc] initWithContentsOfFile:[safariPath stringByAppendingPathComponent:@"PurplePopUpFill.png"]];
endCap = [[NSImage alloc] initWithContentsOfFile:[safariPath stringByAppendingPathComponent:@"PurplePopUpRight.png"]];
}
CGFloat margin = 20.0;
NSRect frame = [self frame];
frame.origin.x += margin;
frame.origin.y += margin;
frame.size.width -= margin*2.0;
frame.size.height = [centerFill size].height;
NSDrawThreePartImage(frame, startCap, centerFill, endCap, NO, NSCompositeSourceOver, 1.0, NO);
}
まず実行直後。
短くしてみる。
伸ばしてみる。
これは便利。Safari4 の Resources ファルダを見るとこの形態の画像は多いのでこの関数が使われているのかもしれない。
frame を画像サイズより小さくするとどうなるのか?
縮小してちゃんと描いてくれる。では大きくするとどうなるのか?
出た。
画質はともかくとして縮小、拡大しても可能な限り形態を保ったまま描画してくれるようだ。
NSDrawNinePartImage
名前から察するにこれは先程の関数の縦横両方向バージョンのようだ。引数もその分多い。
void NSDrawNinePartImage(NSRect frame,
   NSImage *topLeftCorner,
   NSImage *topEdgeFill,
   NSImage *topRightCorner,
   NSImage *leftEdgeFill,
   NSImage *centerFill,
   NSImage *rightEdgeFill,
   NSImage *bottomLeftCorner,
   NSImage *bottomEdgeFill,
   NSImage *bottomRightCorner,
   NSCompositingOperation op,
   CGFloat alphaFraction,
   BOOL flipped
);
(参照)Mac Dev Center: Application Kit Functions Reference
これもサンプルを作ってみた。
適当な画像がみつからなかったので Bitmemo の画像を使ってみた(※サンプルソースコードにコピーを添付)
CutomView.m
- (BOOL)isFlipped
{
return YES;
}
- (void)drawRect:(NSRect)dirtyRect {
// Drawing code here.
[[NSColor lightGrayColor] set];
NSRectFill(dirtyRect);
if (!topLeftCorner) {
topLeftCorner = [[NSImage imageNamed:@"frame_top_left"] retain];
topEdgeFill = [[NSImage imageNamed:@"frame_top_mid"] retain];
topRightCorner = [[NSImage imageNamed:@"frame_top_right"] retain];
leftEdgeFill = [[NSImage imageNamed:@"frame_mid_left"] retain];
centerFill = [[NSImage imageNamed:@"frame_mid_mid"] retain];
rightEdgeFill = [[NSImage imageNamed:@"frame_mid_right"] retain];
bottomLeftCorner = [[NSImage imageNamed:@"frame_bottom_left"] retain];
bottomEdgeFill = [[NSImage imageNamed:@"frame_bottom_mid"] retain];
bottomRightCorner = [[NSImage imageNamed:@"frame_bottom_right"] retain];
NSLog(@"%@", bottomRightCorner);
}
CGFloat margin = 20.0;
NSRect frame = [self frame];
frame.origin.x += margin;
frame.origin.y += margin;
frame.size.width -= margin*2.0;
frame.size.height -= margin*2.0;
NSDrawNinePartImage(frame, topLeftCorner, topEdgeFill, topRightCorner, leftEdgeFill, centerFill, rightEdgeFill, bottomLeftCorner, bottomEdgeFill, bottomRightCorner, NSCompositeSourceOver, 1.0, YES);
}
実行するとこんな感じ。
出た。ウィンドウの拡大縮小に合わせて描画される。
縮小しすぎると表示が崩れる。一定以上に小さくならないように制限が必要。
なお top-left と bottom-right corner image は端の大きさを決めるの使われているので、例えば bottomRightCorner が nil だったりすると右と下の画像はまったく表示されない。
画像ファイルをスペルミスして気がついた。
(関連情報)
NSDrawNinePartImage
あらかじめ枠となる画像を1枚用意しておき、それを9分割して NSDrawNinePartImage で使う方法が書かれていた。面白い。
Re: NSDrawNinePartImage draws slowly in CALayer
CALayer で使うと遅いという話題。シンプルな NSView で使っている限りでは遅くはなかった(v10.6)。
ソースコード
GitHubからどうぞ。
NSDrawNinePartImageStudy at master from xcatsan's SampleCode - GitHub
NSDrawThreePartImageStudy at master from xcatsan's SampleCode - GitHub


